
How to Hold Yarn When Crocheting - Tutorial Three
In tutorial three of How to Crochet Step by Step, we will go through how to hold yarn when crocheting.
Getting this right is important. The way you hold your yarn can determine your whole crocheting style and how your crochet project turns out.
It needs to aid us in our crocheting, not give us any hand or wrist tension and also help us to produce an item that we will love.
How I hold my yarn is shown in the photo below and I will talk you through how to get to this point.

There’s no Right or Wrong Way to Hold Yarn
Everyone crochets a slightly differently and so we also tend to hold our yarn in different ways too. There is no right or wrong way to hold it.
You may hold your crochet hook like a knife or maybe you tend to crochet tightly which means you may end up holding your yarn differently to the way I do.
It all comes down to trial and error. The best thing to do is try different techniques and different ways and see which suits you best. As with everything, it take a bit of practice, so keep trying before you decided on a favourite way.
I will show you how I personally hold my yarn when I crochet which I find is the best for me and my naturally tight tension. This style allows me full control over my tension and easy manoeuvrability.
How Should Holding the Yarn Aid Us?
The way you hold your yarn when crocheting should help you with your crochet work and not hinder. The positioning of the yarn around your fingers and in your hand needs to give you the room for yarning over with ease.
You want your crochet work to flow easily allowing a more consistent tension and thus a more uniform set of stitches. The holding of the yarn should also allow you to control your tension with an easy, subtle manoeuvre of the fingers.
So that when you’re crocheting, if you notice that your tension has changed suddenly (which can happen for many reasons), you can easily adjust your grip to get back to your usual flow.
OK let’s get to it.

How to Hold Yarn When Crocheting
Personally, as mentioned above, I use a pencil grip to crochet and my tension tends to be tight. I have found that this way of holding my yarn is best for me and I will guide you through it below.
Watch the Video
I have created a quick YouTube video for you if you prefer to watch how to do it rather than read through written instructions. If you prefer to read the each step then simply scroll down to find the written information with photos.
Step by Step Written Instructions with Photos
1. Start by wrapping the working yarn around your little finger, as shown below.

2. Keep the yarn going under your ring finger, see below.

3. Then in between your ring finger and middle finger.
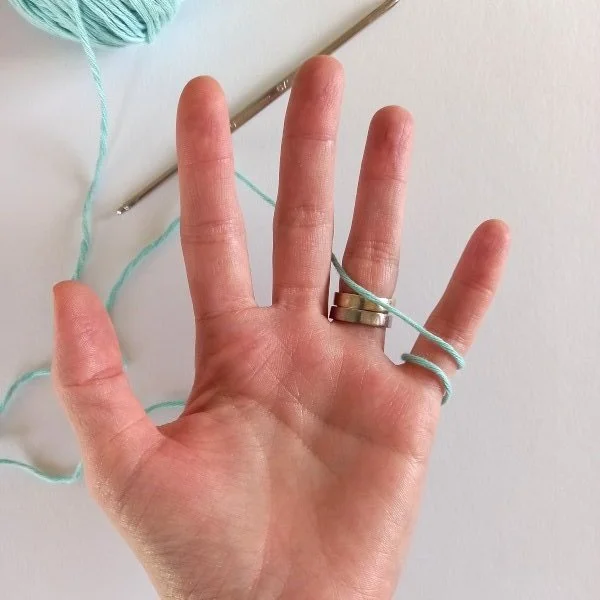
4. Then, turning your hand around so that your palm faces down. Run the yarn over your middle finger and index finger.

5. Finally, hold your work in between your index finger and thumb to begin working.

How Holding it This Way Helps with Tension
Holding it like this means that I can hold my work with my index finger and thumb as mentioned in the final step above. By raising my middle finger slightly, I can create space for me to yarn over with ease.
My ring finger and little finger control my tension. If I want my tension to be tighter (my stitches to be tighter) then I can squeeze both my ring and little finger to do that or let go for less tension.
That’s it!
I really hope this has helped. If you have any questions, as always pop them in the comments below.
Make sure you get a notification about the next tutorial by subscribing to my YouTube channel.